


Gardening has anchored my life for about 45 years now. More than an activity, it is it also a frame of mind, a way to connect with nature and a calming time that lets you leave worries behind, if only for a brief period each day. It also has a cumulative effect, creating a deeper sense of gratitude for nature and life itself. And it has practical benefits. It can put food on the table and give you a chance to be outside, enjoy the sun and fresh air. Best of all, it can happen in a manageable, accessible environment, like a deck, porch or patio.
Sponsored Content
1. Gather the Essentials
For me, gardens are a place to raise food, but vegetable plants go especially well with flowers and other plants on a deck. Choose a space with a solid rolling surface and room enough to grow a few or several plants — a wooden deck, porch or concrete slab. A table-like surface you can roll under for starting seeds and potting up plants is necessary, unless you plan on buying starts. A few small tables or other raised surfaces are good for setting up containers at wheelchair level. Your accessible garden space should also have water available close by.
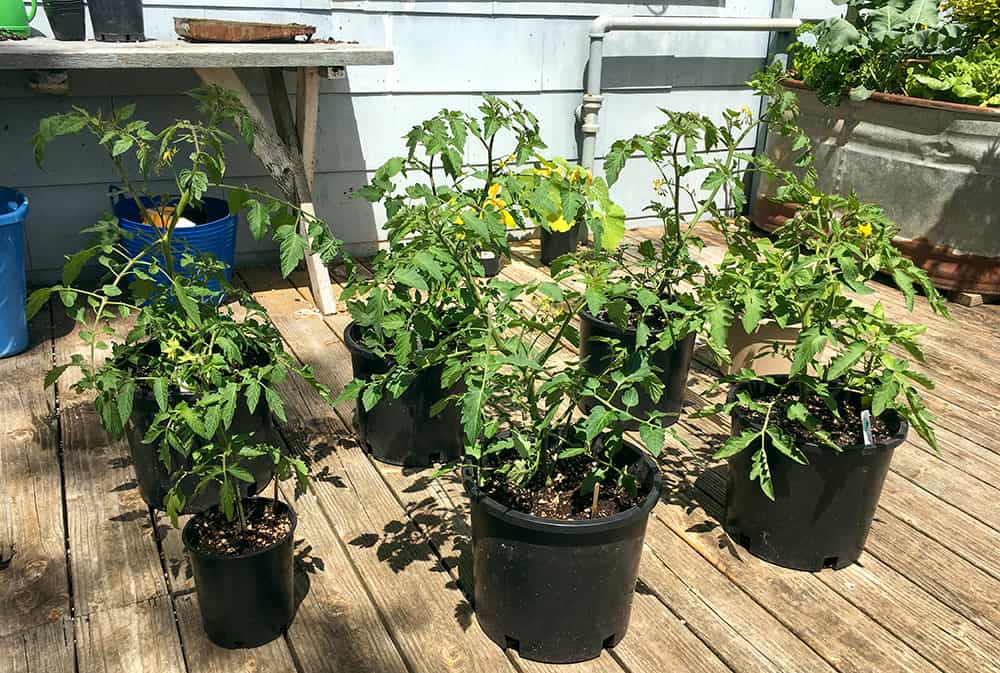
Last spring, at the beginning of the pandemic, I decided to raise tomato plants and lettuce on my deck. I ended up getting carried away and added broccoli, beans, squash, peppers, basil and parsley, just to see if I could grow them successfully in containers. By season’s end, my plants and containers took up about 30-40 square feet of space — about a 6-by-6-foot area.
2. Choosing Your Soil
The foundation of any plant is its soil or growing medium. For containers, dirt dug from the earth can be heavy, messy and difficult to work with. You can make your own growing medium or buy a packaged mix from a nearby garden center. You can also find good products online. If you grow organically, there are more options now than ever before.
Last year I used a local organic mix called Opus Grows Mix #1. Whatever you use, if the label says “OMRI listed,” that means it is approved by the Organic Materials Review Institute. I used that mix for potting all my vegetables, which I grew from seed. The seedling mix should be finer, however. I used Black Gold seedling mix, not to be confused with Black Gold potting mix.
3. Growing From Seeds, Starts or Both
Starting seeds requires some hand dexterity, but you can direct a helper, friend or family member to prepare your mix, fill flats and sow seeds. Handling seeds, many of them tiny, can be a problem for anyone. Common seed sowing tools may be managed by those who can hold a lightweight tool in their hand or hands. You may be able to come up with an adaptation that works for you. You can also purchase some seeds in pelletized form — small round balls larger than a BB. These are easier to handle than say, natural lettuce or tomato seeds, which are small, flat and difficult to work with.
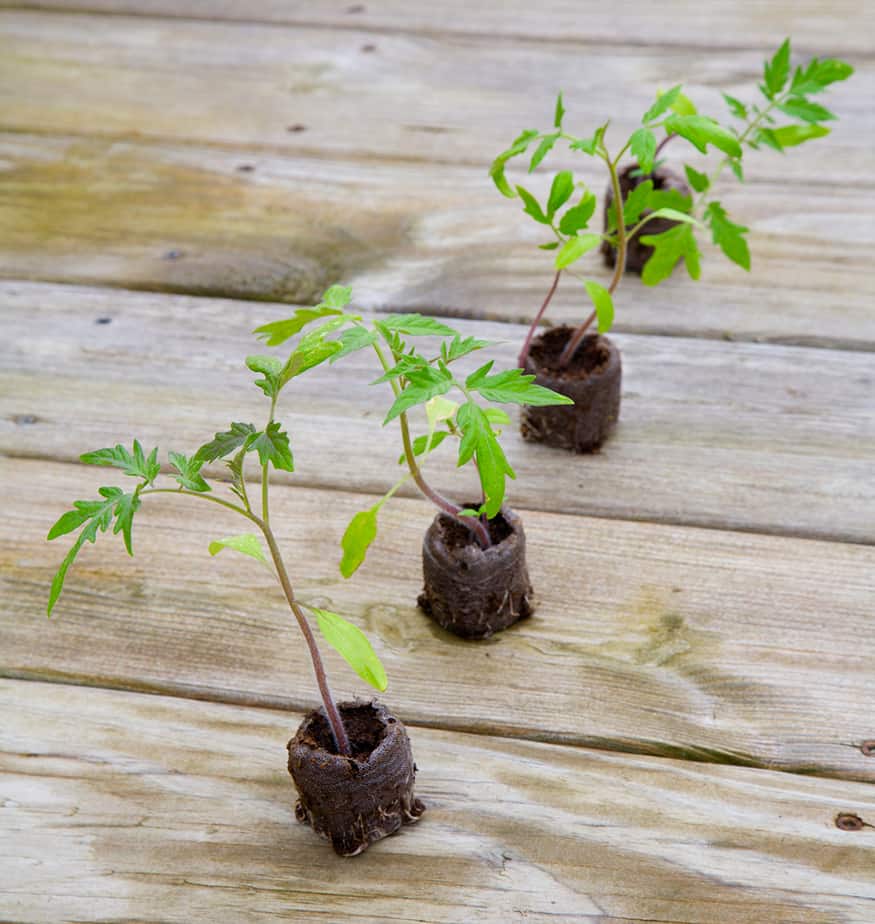
Here is an idea you may be able to adapt and improve on. Buy mostly pelleted seed. Start seeds in Jiffy Peat Pellets. All they need is water. Add it from the bottom and they will soak it up and swell. Place your seed or seeds in the center of each Peat Pellet. Using round pelleted seeds is way easier, but you also can use natural seed. Buying starts from a garden center is easier than starting your own seeds but can get expensive. Also, watching those first few seeds emerge in the spring is a joy.
All they ask in return is sufficient water, sun and protection from freezing and wind and pounding rain. When they are newly planted and are outside and vulnerable, it’s best to keep them covered with plastic at night. Remove the plastic during the day so they can get air and sun, or when they outgrow the plastic covering.
4. Picking The Best Seeds
Find a good spring catalog from a reputable company, preferably located in your growing region. Since I live in Oregon, I use two seed catalogs, one from in-state, the other from Maine. Why Maine? Because Northwest and Northeast regions have similar growing seasons. I have used Johnny’s Seeds (from Maine) for decades, and I find their catalog to be full of useful products, including tools, as well as a large variety of interesting seed varieties and basic instructions for how to grow each type of plant.

5. Setting Up the Garden
Each type of plant requires an optimal soil depth. Shallow-rooted lettuce and broccoli can be grown in only 6-8 inches of soil. I used an old stock watering tank for a deck planter. It isn’t pretty, but you can grow a season’s worth of lettuce and two or three broccoli plants in it. A planter can be plastic, wood or metal, but it must have drainage and be at optimal height for wheelchair use. I like planters that are no wider than arm’s reach and four to six feet long.
For larger plants, fill 3-to-5-gallon containers, or larger, with 10-16 inches of potting soil. To have good access, elevate them slightly. Keep in mind that you will have to roll up to a planter and may have to position yourself “sidesaddle,” instead of head-on, unless it is built to roll under. I created a makeshift false bottom for my stock tank by putting upturned bins and buckets in the bottom of the tank, laid a simple wooden frame on them and stapled wire mesh to the wood, then placed a weed barrier mat over that before filling it with my growing medium. I used only 8 inches of soil, but the mesh allowed water to drain to the tank bottom, where an overflow port allowed it to escape.
If that sounds like a chore, it was. If I had it to do over again, I would buy or build a simple wooden planter or planters.
6. Experiment With Veggies
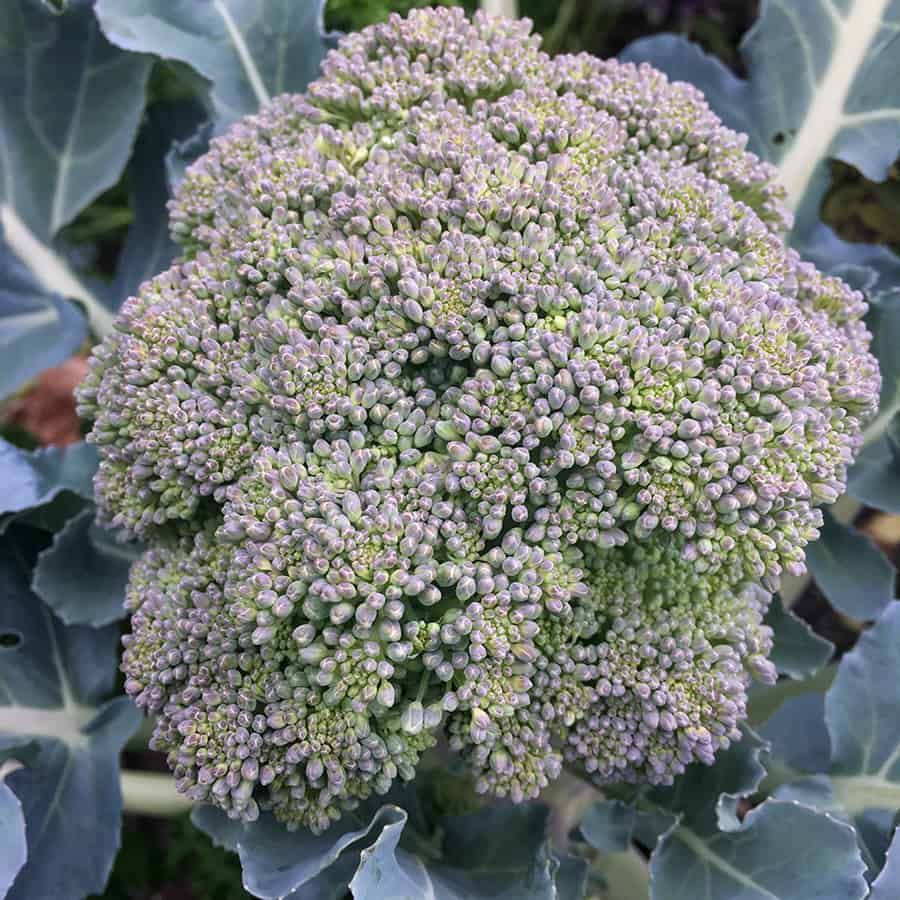
I had surprising success growing broccoli in my tank planter, along with lettuce. If you want more central heads of broccoli, add a separate planter. It’s best to plant your lettuce and broccoli seeds in succession so they don’t mature all at once. Three or four different plantings should be sufficient, depending upon the size of your family.
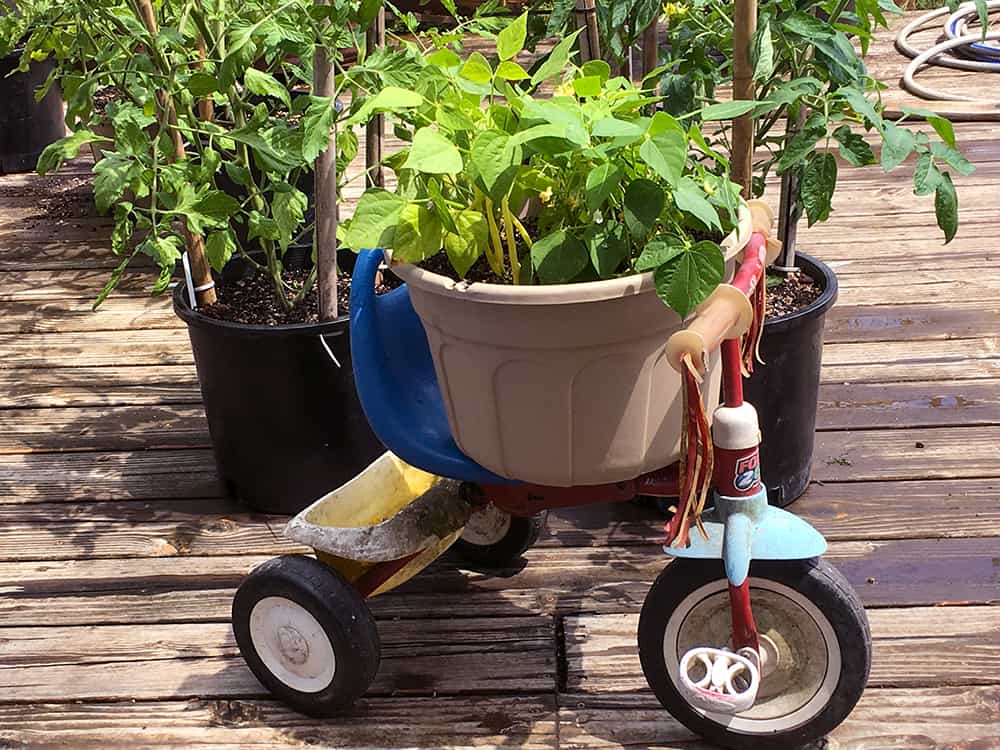
I planted a yellow snap bean variety on a whim and was surprised by the yield from a clump of three plants that I planted together in a wide, 16-inch-diameter pot. Two pots’ worth should yield several sizable helpings. Remember, beans need heat (60 degrees or more to germinate), water and fertile soil, or fertilizer added when growing in pots.
Squash is easy to grow but requires a good-sized container and lots of root space and nutrients — and the yield will never compare with field-grown plants. For a deck, I suggest growing smaller varieties like “8-Ball” (smaller, round summer squash). They are prolific yielders.
Basil and parsley — I prefer “Giant Italian Parsley” — are surprisingly easy to grow and should be harvested every week or two to keep them fresh and producing. Bell peppers may only produce four or five fruits per plant, but my yellow variety did better than I expected.
7. Starting Tomatoes and Lettuce

For me, these are a mandatory salad base. I grow mainly small lettuce varieties, like “Little Gem” or “Tom Thumb.” They make nice tight heads in little space and are tasty with a good mix of crunchy and leafy leaves. A nice red leaf is good to add, but you can buy quality red leaf at the market, and it goes a long way.
The key to growing successful lettuce starts is exposing them to the right temperature. I like to separate my tomato seedlings from my lettuce seedlings because tomatoes germinate best at 70-85 degrees, while lettuce does best at 55 to 70. Lettuce will not germinate in full sun on a hot day in the high 70s or 80s.
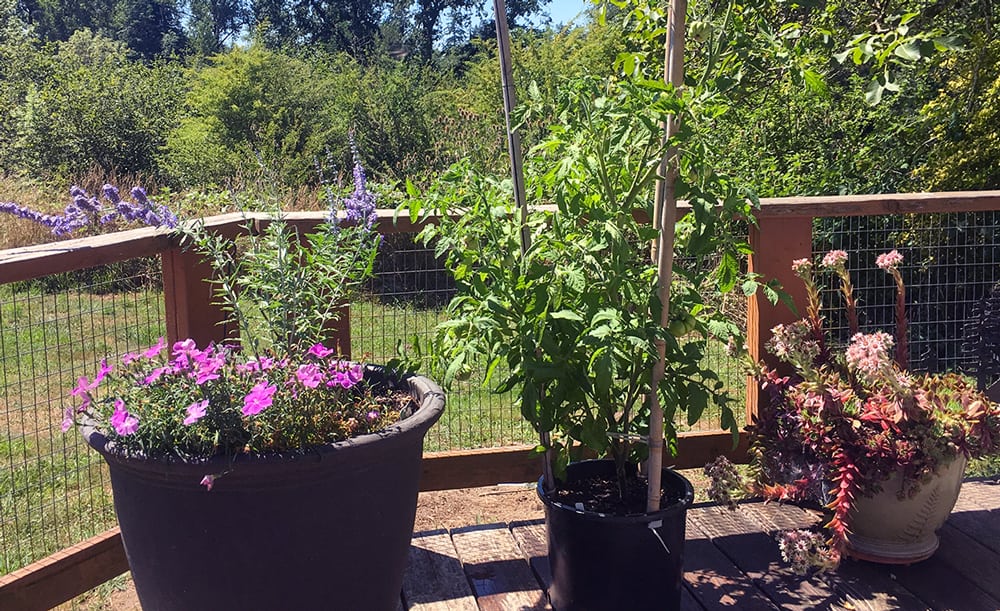
For tomato varieties, there are nearly endless possibilities, but deck space must be considered. I used indeterminate varieties of taller, staked plants to maximize yield and preserve space. It took a lot of care but was worth it. I grew two reliable and tasty cherry tomato varieties (“Sungold” and “Sweet Million”), and for the first time, “Black Krim,” an heirloom — on the advice of a good friend — that disappointed me. Too little fruit, spoils easily. This year I will grow an old reliable, “Early Girl,” in an indeterminate variety. It also comes as a bush plant.
To stake my tomatoes on my deck, I used 6-7 foot bamboo poles placed on the inside perimeter of the pot (four per pot at 12, 3, 6 and 9 o’clock). When the plants needed help to stay upright, I wound nylon or sisal twine around the poles to support branches when they were laden with fruit (see photo above). It worked well, but I needed help in supporting branches while I wound the twine around the poles. I also drilled holes at the tops of containers and secured the poles with zip ties, for stability.
8. Watch the Weather Closely
Respect Mother Nature and her unpredictability by consulting the latest up-to-date forecasts from an authentic source — like the National Weather Service for your specific area. To me, Farmer’s Almanacs are about as reliable as astrological forecasts. Stay away from them. Be certain to have a protected space for your plants in the event of sudden wind or hail or pounding rain, especially when plants are tender and most vulnerable. I sometimes had my wife or grandson move plants to a protected area the night before expected bad weather, just to be safe.
Bad weather and disease often go hand-in-hand. Most diseases are either soil-borne, which you can limit with good quality, soil-less growing medium, or the result of excessive moisture and poor air circulation. If you have healthy plants, disease will not harm them to the point of affecting the fruit. Seedlings are especially vulnerable to too-high humidity. Be certain they always have air.

9. Keeping Costs Down
Space, time and money. These are the main factors in growing a garden, wherever you grow. If you own the space, it’s free. If you have the time, you are fortunate and highly likely to succeed. Out-of-pocket expenses vary, but a good rule of thumb is only pay for what you cannot do yourself with a little more effort or ingenuity. Most wheelchair users have learned this lesson as a way of life. I save seeds from season to season so I don’t have to buy them every year.
You can make seedling and potting mixes yourself if you get the basic ingredients separately, mainly peat moss and well-composted garden soil. Garden centers sell soil if you don’t have your own. Be sure to get something that adds good aeration, like natural pumice, perlite or coir fiber, which comes from coconut shells and is resistant to bacteria and disease. Moisture retention is boosted when you add vermiculite.
Seedling mixes can be simpler. I have raised healthy seedlings in a simple home-made peat moss, vermiculite and perlite mix. The seedlings will get started without nutrients but should be placed in potting soil that has nutrients after two or three weeks for best growth.
10. Harvest And Plan For Next Year!
The payoff for all your work, attention and care comes with the fruit of the harvest, the good feeling you get knowing you are eating healthy veggies, a feeling of accomplishment and, as I mentioned before: reduced stress. The time and love you give your plants each spring and summer return to you multiplied in late summer and fall, if not before.
If you have a little disappointment at harvest time, try again the next growing season. Spring in all its wonder is a reliable and trustworthy friend, and gardening will boost your spirits each year.
More Gardening Resources:
Here are resources that will answer just about any question you can think of about how to start your garden:
• gardenerspath.com/plants/vegetables/best-container/
• gardenerspath.com/plants/vegetables/grow-tomatoes-containers/
• newmobility.com/2018/03/accessible-gardening/
• thegardeningcook.com/vegetable-garden-on-a-deck/
Using peat pellets
• ugaurbanag.com/using-peat-pellets-for-seed-starting/
• youtube.com/watch?v=PmyGBrKvzbs
Easy organic fertilizers
• rexius.com/collections/wholesale/brand-opus-grows
• oldworldgardenfarms.com/2017/02/02/simple-organic-fertilizers/
• gardeners.com/buy/organic-compost-for-containers/31-571.html?SC=XNET0349#q=organic%2Bfertilizer&start=7
Support New MobilityWait! Before you wander off to other parts of the internet, please consider supporting New Mobility. For more than three decades, New Mobility has published groundbreaking content for active wheelchair users. We share practical advice from wheelchair users across the country, review life-changing technology and demand equity in healthcare, travel and all facets of life. But none of this is cheap, easy or profitable. Your support helps us give wheelchair users the resources to build a fulfilling life. |

Thank YOU
I am a gardener… this is great reference